A fact sheet to support the Soil CRC’s ‘Soil characterisation using a soil pit (NSW)’ webinar, delivered as part of our ‘Building technical capacity for improved soil management’ webinar series.
In this webinar, Abigail Jenkins, formerly with NSW Department of Primary Industries (now with Soil Science Australia), guides viewers through:
- how to use soil pits as an extension tool
- how to characterise a soil pit, including planning and supporting resources
- techniques for characterising different soil horizons
- the use of monoliths and other existing sites as alternatives to traditional pits
- how to access online soil data for New South Wales.
Purpose Of The Soil Pit
Soil pits can serve as a focal point for discussion or as an extension tool to engage those interested in understanding more about the characteristics of their soils. Be clear about what you want to show your audience and why you are engaging them in the soil pit. This will determine where the pit or pits should be located in the landscape and within the paddock.
Lighting
Consider the time of the day the soil pit will be examined when determining the location and siting of the soil pit, as different lighting conditions can impact visibility of the pit face.
There may be an opportunity to create a long shallow trench to run across a number of soil types. Consider a wedge-shaped pit rather than a trench, providing safer access and better viewing (See ‘C1 Soil pit digging’ in SOILPAK for Cotton Growers, NSW DPI). Importantly, don’t forget to dial before you dig to locate services.
You can also use road batter or existing excavations, for example silage pits and soil peel (See ‘Soil peels: their preparation and presentation’, DPIRD WA).
Understanding Soil In The Landscape
It’s important to understand your soil in the context of the landscape and its geological history. Explaining where the soil is situated in the landscape, its geological origins, and how it relates to the surrounding environment can be engaging for people.
By discussing factors like the depth of topsoil on hills versus valleys, the influence of volcanic activities, and the transition between different soil types, you can provide valuable insights into the soil’s characteristics and origins. Sharing this information can help participants develop a deeper appreciation for the soil they are examining and its connection to the broader landscape.
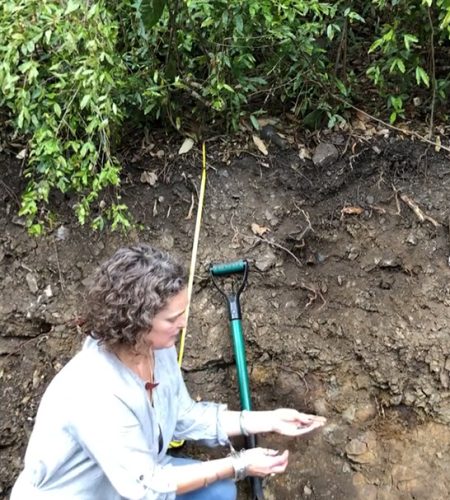
Observing Soil Profile Characteristics
Where is the soil in the landscape?
Utilise geological knowledge about the area to interpret the soil’s features, such as the influence of parent material, weathering, and the presence of stones.
Engaging participants by asking what they notice first, such as soil colour, encourages active exploration of the soil profile. This engagement encourages a hands-on approach to understanding soil characteristics within the landscape.
Texture and structure
Understanding the differences between texture and structure provides valuable information for soil management. Texture and structure can be assessed using tools like ‘The Yellow Book’ (Australian Soil and Land Survey Field Handbook, CSIRO), and indicate the soil’s water holding capacity, cation exchange capacity, and the impact on plant growth.
Biological activity
Soil depth and rooting depth affect plant health, especially during water stress, and how impervious layers can lead to waterlogging and distinct soil colours. Look for evidence of biological activity, such as wormholes, eggs, and root channels, as indicators of soil health.
This practical approach helps participants gain a deeper understanding of soil characteristics and their implications for plant growth and soil management. Consider using aids like hand lenses and USB microscopes to study soil biology, and/or preserving specimens with ethanol alcohol to study them later.
Involve the audience as much as possible in the soil assessments so they gain soil characterisation skills they can use to understand their own soils.
What To Look At
The Northern Rivers Soil Health Card was developed as a practical tool that all landholders in the Northern Rivers Region can use to monitor the health of their soils, and is a good example of an approach that can be used anywhere. The core of the card has a list of 10 straightforward visual tests that require simple equipment and can be carried out by one person in the field.
- Ground cover
- Penetrometer
- Infiltrometer
- Diversity of soil life
- Root development
- Soil structure
- Aggregate stability
- Earthworms
- Soil pH
- Leaf colour
Also consider:
- Where is the profile in the landscape?
- Depth of profile or depth to a (perceived) root-limiting layer
- Soil colour
- Identify soil horizons or layers
- Texture of each layer – note ribbon length and feel
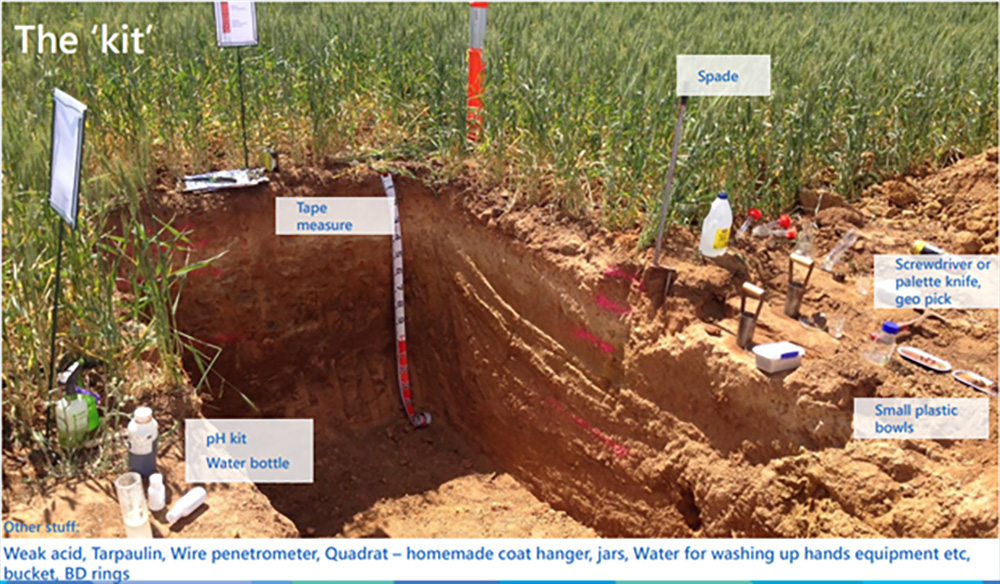
Your Soil Pit Kit
Here is a list of the equipment you’ll need to characterise soil using a soil pit:
- Tape measure
- Spade
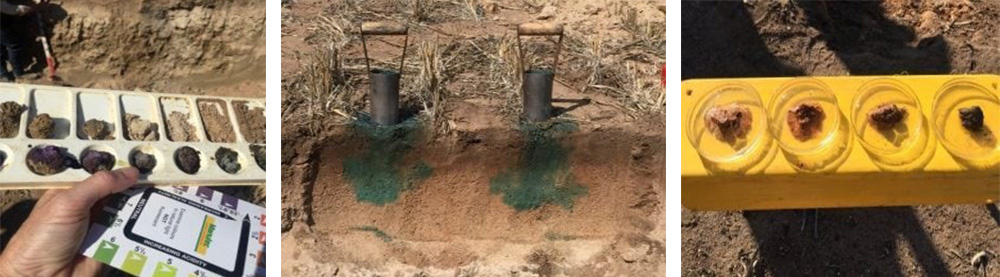
- pH kit – pick up a pH kit at your local hardware store and use with a paint pallet tray
- Water bottle
- Screwdriver or palette knife
- Geo pick
- Small plastic bowls
- Weak acid
- Tarpaulin
- Wire penetrometer
- Quadrat – homemade using coat hanger
- Jars
- Water – for washing hands and equipment
- Bucket
- Bulk density (BD) rings